This documentation is available as Markdown for AI agents and LLMs. See the full Markdown index or append .md to any documentation URL.
开发构建简介
了解如何在你的 Expo 项目中创建一个开发版本,以及为什么要使用开发版本而不是 Expo Go。
创建一个带有 AI 代理的开发版
把这个粘贴到 Claude、Cursor、Codex 或其他代理里。
Build locally
Set up a development build for my Expo project and compile it on my machine.

Run `npx expo install expo-dev-client`, then run `npx expo run:android` or `npx expo run:ios` for the platform I name. Add `--device` to install on a physical device. Start the development server with `npx expo start` once the build is installed.

Run `npx expo prebuild --clean` for the first time to complete development builds setup. Later, use the same command to before rebuilding whenever a native dependency or the app config changes. Match the package manager this project already uses, and report what you ran.

For the introduction to development builds, see https://expo.nodejs.cn/develop/development-builds/introduction/?buildenv=build-locally.
Build with EAS
Set up a development build for my Expo project and build it on EAS.

Run `npx expo install expo-dev-client`. Check that eas-cli is installed and that I am logged in. Create an eas.json with a development profile if the project has none. For an iOS Simulator build, set `ios.simulator` to true on that profile first. Then stop and ask me: "Everything is installed. Do you want to build now?" Wait for my answer. When I say yes, run `eas build --platform <platform> --profile development` for the platform I name.

Install the finished build on an Android Emulator or iOS Simulator (platform I have specified) when the CLI offers to, then start the development server with `npx expo start`. Match the package manager this project already uses, and report what you ran.

For the introduction to development builds, see https://expo.nodejs.cn/develop/development-builds/introduction/?buildenv=build-with-eas.
Build locally with EAS CLI
Set up a development build for my Expo project and run the EAS build on my own machine.

Run `npx expo install expo-dev-client`. Check that eas-cli is installed and that I am logged in. Create an eas.json with a development profile if the project has none. For an iOS Simulator build, set `ios.simulator` to true on that profile first. Then stop and ask me: "Everything is installed. Do you want to build now?" Wait for my answer. When I say yes, run `eas build --platform <platform> --profile development --local` for the platform I name.

Install the resulting .apk or .app archive on my emulator or simulator, then start the development server with `npx expo start`. Match the package manager this project already uses, and report what you ran.

For the introduction to development builds, see https://expo.nodejs.cn/develop/development-builds/introduction/?buildenv=eas-cli-local.
当你使用 create-expo-app 创建一个新的 Expo 应用时,你会从一个项目开始,在本地机器上更新 TypeScript/JavaScript 代码,并在 Expo Go 应用中查看更改。开发构建本质上是你自己的 Expo Go 版本,你可以自由使用任何原生库并更改任何原生配置。
🌐 When you create a new Expo app with create-expo-app, you start with a project where you update TypeScript/JavaScript code on your local machine and view the changes in the Expo Go app. A development build is essentially your own version of Expo Go where you are free to use any native libraries and change any native configuration.
当你想创建自己的应用并发布到应用商店时,推荐使用开发版构建。它包含 expo-dev-client 库,这个库增强了内置的 React Native 开发工具。这个工具还支持检查网络请求,还有一个 “启动器”界面,让你可以在不同的开发服务器之间切换(比如在你电脑上运行的服务器或队友电脑上的服务器),以及切换应用的不同部署版本(比如通过 EAS Update 发布的更新)。
🌐 A development build is recommended when you want to create your own app and release to app stores. It includes the expo-dev-client library, which augments the built-in React Native development tooling. The tooling also includes support for inspecting network requests and a "launcher" UI that lets you switch between different development servers (such as between a server running on your machine or a teammate's machine) and deployments of your app (such as published updates with EAS Update).
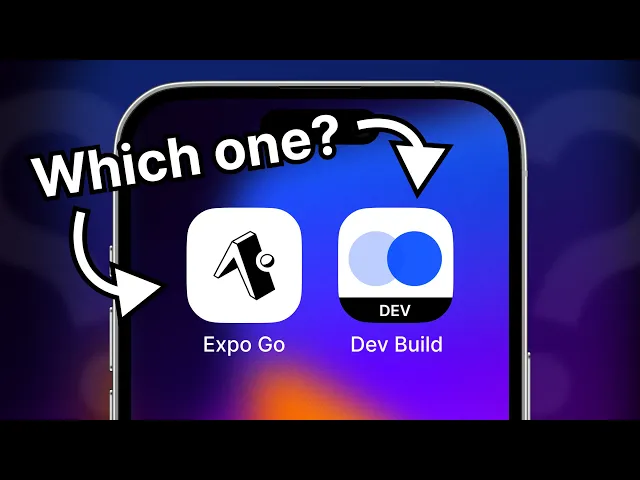
在这个教程视频中,Beto 解释了每一个是什么以及什么时候选择开发版。
你想怎么构建你的开发版本?
🌐 How would you like to build your development build?
这三种方法生成的开发版本都是一样的,它们的区别在于应用在哪儿编译,以及你的电脑上需要安装什么。
🌐 All three methods produce the same development build. They differ in where the app compiles and what you need to have installed on your machine.
本地构建
🌐 Build locally
用 Expo CLI 和你本地的工具链自己编译应用。无需 Expo 账户,这是在没有付费 Apple 开发者账户的情况下在 iPhone 上安装开发版本的唯一方法。
🌐 Compile the app yourself with Expo CLI and your native toolchain. No Expo account is required and this is the only way to install a development build on an iPhone without a paid Apple Developer account.
主机平台支持
🌐 Host platform support
1 要求
1 要求
为你要开发的平台设置开发环境:Android Studio 和模拟器 用于 Android,Xcode 和 iOS 模拟器 用于 iOS。
1
安装 expo-dev-client
🌐 Install expo-dev-client
在项目的根目录下运行以下命令:
🌐 Run the following command in your project's root directory:
你在现有的 React Native 项目中使用这个库吗?
不使用Continuous Native Generation的应用或使用npx react-native创建的应用,在安装此库后需要进一步配置。请参阅在现有 React Native 项目中安装expo-dev-client的步骤 1 和 2。
🌐 Apps that don't use Continuous Native Generation or are created with npx react-native, require further configuration after installing this library. See steps 1 and 2 from Install expo-dev-client in an existing React Native project.
开发版看起来什么样?
可以在没有
expo-dev-client库的情况下使用开发版本。在这种情况下,使用npx expo start --dev-client启动开发服务器,以针对你的开发版本,而不是 Expo Go。
2
构建并运行应用
🌐 Build and run the app
默认情况下,应用会安装在正在运行的 Android 模拟器上。对于实体设备,通过 USB 连接,提示时允许 USB 调试,然后加上 --device 标志。
🌐 By default the app installs on a running Android Emulator. For a physical device, plug it in via USB, allow USB debugging when prompted, and add the --device flag.
默认情况下,应用会安装在 iOS 模拟器上。要在 iPhone 上安装,先连接设备,启用开发者模式,确保你的应用配置有唯一的 ios.bundleIdentifier,然后添加 --device 标志。
🌐 By default the app installs on the iOS Simulator. For an iPhone, plug it in, enable developer mode, make sure your app config has a unique ios.bundleIdentifier, and add the --device flag.
这个命令会运行 prebuild 来生成本地 android 和 ios 目录(如果它们不存在的话),然后编译应用、安装它,并启动开发服务器。
🌐 This command runs prebuild to generate the native android and ios directories if they don't exist, then compiles the app, installs it, and starts the development server.
3
本地代码有变时重建
🌐 Rebuild when native code changes
expo run:android|ios 命令在后续运行时会重复使用原生 android 和 ios 目录。当你只修改了应用的 TypeScript/JavaScript 代码时,不需要重新构建原生应用。相反,可以这样启动开发服务器:
🌐 The expo run:android|ios command reuses the native android and ios directories on later runs. When you only change your app's TypeScript/JavaScript code, there is no need to rebuild the native app. Instead, start the development server with:
你只需要在以下情况下重新生成原生目录(android 和 ios):
🌐 You only need to regenerate the native directories (android and ios) when:
在这些情况下,使用以下命令重新生成本地目录:
🌐 In these cases, regenerate the native directories with:
然后,使用更新的原生代码重新构建你的应用,命令如下:
🌐 Then, rebuild your app with the updated native code, with:
如果没有本地目录,所有 Expo 构建工具(
npx expo run:android|ios和eas build)会自动运行预构建,所以你第一次不需要手动运行。了解更多关于 持续本地生成 (CNG) 的信息。
在你安装开发版本之后
🌐 After you install the development build
从你设备的主屏幕启动开发版本,然后从启动器屏幕连接到开发服务器,就可以开始开发你的应用了。想了解如何使用你的新版本,包括启动器屏幕、重建以及调试,请参阅 使用开发版本。关于开发版本和 Expo Go 的常见问题,包括在 Expo Go 中不能做的事情及原因,请参阅 常见问题。
🌐 Launch the development build from your device's Home screen and connect to a development server from the launcher screen to start working on your app. To learn how to use your new build, including the launcher screen, rebuilding, and debugging, see Use a development build. For common questions about development builds and Expo Go, including what you can't do in Expo Go and why, see the FAQ.
AI代理的 Expo 技能
🌐 Expo Skills for AI agents
如果你使用 AI 代理,安装 Expo Skills 来教它本页面的工作流程:
🌐 If you use an AI agent, install Expo Skills to teach it the workflows on this page:
Build and distribute Expo development clients locally or via TestFlight for internal testing.
Run and control a user's app on a remote iOS/Android simulator hosted on EAS cloud.