This documentation is available as Markdown for AI agents and LLMs. See the full Markdown index or append .md to any documentation URL.
开始开发
对 Expo 项目进行第一次更改并在你的设备上实时查看。
1
2
在你的设备上打开应用
🌐 Open the app on your device
运行上述命令后,你将在终端中看到一个二维码。扫描此二维码即可在你的设备上打开应用。
🌐 After running the command above, you will see a QR code in your terminal. Scan this QR code to open the app on your device.
如果你正在使用 Android 模拟器或 iOS 模拟器,你可以分别按 A 或 I 来打开应用。
信息 在真实的 iOS 设备上使用 Expo Go? 只有当 Expo CLI 和 Expo Go 登录同一个 Expo 账户时,Expo Go 才能打开你的项目。在你的电脑上运行
npx expo login,然后用相同的账户登录 Expo Go。查看 设置你的环境。
遇到问题了吗?
确保你的电脑和设备连接在同一个 Wi-Fi 网络上。
🌐 Make sure you are on the same Wi-Fi network on your computer and your device.
如果你在物理 iOS 设备上看到关于账户的错误,信息会告诉你需要修复的内容。要登录 Expo CLI,在电脑上运行 npx expo login。要登录 Expo Go,点击右上角的账户图标。两者使用同一个账户,然后按 重试。查看 需要 Expo Go 登录 了解每条信息。
🌐 If you see an error about accounts on a physical iOS device, the message tells you what to fix. To sign in to Expo CLI, run npx expo login on your computer. To sign in to Expo Go, tap the account icon in the top-right corner. Use the same account for both, then press Try Again. See Expo Go sign-in required for every message.
如果仍然不起作用,可能是由于路由配置——这在公共网络中很常见。你可以通过在启动开发服务器时选择 Tunnel 连接类型来解决此问题,然后再次扫描二维码。
🌐 If it still doesn't work, it may be due to the router configuration — this is common for public networks. You can work around this by choosing the Tunnel connection type when starting the development server, then scanning the QR code again.
使用 Tunnel(隧道) 连接类型会使应用的重载速度明显比 LAN(局域网) 或 Local(本地) 慢,因此最好在可能的情况下避免使用隧道。如果需要通过 Tunnel 从网络上的其他设备访问你的计算机,你可能需要安装并使用模拟器或模拟设备来加快开发速度。
3
进行你的第一次更改
🌐 Make your first change
在你的代码编辑器中打开 src/app/index.tsx 文件并进行修改。
🌐 Open the src/app/index.tsx file in your code editor and make a change.
更改没有在你的设备上显示吗?
Expo Go 默认配置为在文件更改时自动重新加载应用,但让我们确保熟悉一下启用它的步骤,以防万一出现问题。
🌐 Expo Go is configured by default to automatically reload the app whenever a file is changed, but let's make sure to go over the steps to enable it in case somehow things aren't working.
-
确保你在 Expo CLI 中启用了开发模式。
-
关闭 Expo 应用并重新打开。
-
一旦应用再次打开,摇动你的设备以显示开发者菜单。按下 Cmd ⌘ + D。
-
如果你看到 快速刷新 已启用,请切换它。如果你看到 禁用快速刷新,关闭开发者菜单。现在尝试进行另一次修改。
文件结构
🌐 File structure
下面,你可以了解默认项目的文件结构:
🌐 Below, you can get familiar with the default project's file structure:
Files
应用
包含应用的导航,这是基于文件的。src/app 目录的文件结构决定了应用的导航。
🌐 Contains the app's navigation, which is file-based. The file structure of the src/app directory determines the app's navigation.
该应用有两个由两个文件定义的路由:src/app/index.tsx 和 src/app/explore.tsx。src/app/_layout.tsx 中的布局文件使用特定平台的 AppTabs 组件设置了标签导航器。
🌐 The app has two routes defined by two files: src/app/index.tsx and src/app/explore.tsx. The layout file in src/app/_layout.tsx sets up the tab navigator using the platform-specific AppTabs component.
特性
🌐 Features
默认项目模板具有以下功能:
🌐 The default project template has the following features:
Default project
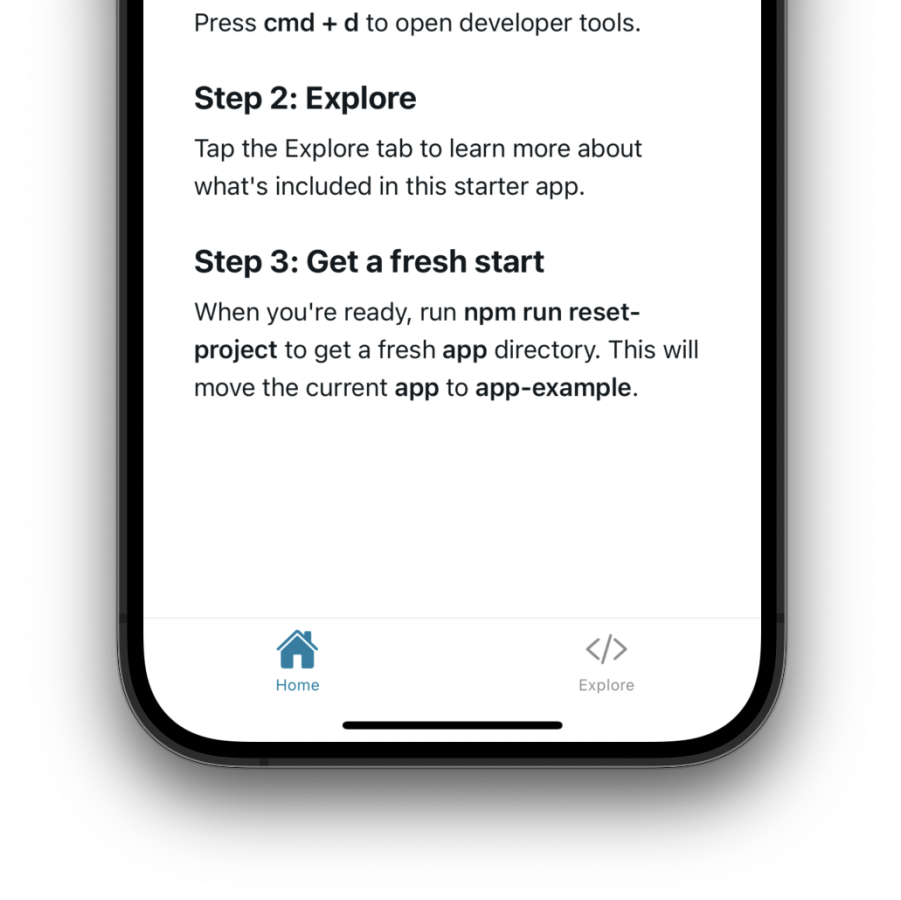

基于文件的路由
该应用有两个屏幕:src/app/index.tsx 和 src/app/explore.tsx。位于 src/app/_layout.tsx 的布局文件使用特定平台的 AppTabs 组件设置导航,该组件在 Android 和 iOS 上使用原生标签页,而在 Web 上使用 Expo Router UI 标签页。
🌐 The app has two screens: src/app/index.tsx and src/app/explore.tsx. The layout file in src/app/_layout.tsx sets up navigation using a platform-specific AppTabs component that uses native tabs on Android and iOS, and Expo Router UI tabs on web.
Learn more