This documentation is available as Markdown for AI agents and LLMs. See the full Markdown index or append .md to any documentation URL.
TabView
用于分页或选项卡内容的 SwiftUI TabView 组件。
Expo UI TabView 与官方 SwiftUI TabView API 相匹配,并通过 tabViewStyle 修饰符在样式之间切换。
🌐 Expo UI TabView matches the official SwiftUI TabView API and switches between styles via the tabViewStyle modifier.
注意: 对于跨全屏路由的底部标签路由导航,请改用
expo-router/unstable-native-tabs。
安装
🌐 Installation
- npx expo install @expo/uiIf you are installing this in an existing React Native app, make sure to install expo in your project.
用法
🌐 Usage
每个页面都是一个 <TabView.Tab> 子元素,通过 value 属性标识。TabView 不会强加自己的高度——给它一个边框,或者将它放在一个会定义高度的父元素中。
🌐 Each page is a <TabView.Tab> child, identified by a value prop. TabView does not impose its own height — give it a frame, or place it inside a parent that does.
页面样式(可滑动分页器)
🌐 Page style (swipeable pager)
使用 tabViewStyle({ type: 'page' }) 创建带可选点指示器的水平分页器。传入 defaultSelection 可以从特定页面启动分页器,而无需通过 React 控制它。
🌐 Use tabViewStyle({ type: 'page' }) for a horizontal pager with optional dot indicators. Pass defaultSelection to start the pager on a specific page without controlling it from React.
import { Host, Spacer, TabView, Text, VStack } from '@expo/ui/swift-ui';
import {
  background,
  font,
  foregroundStyle,
  frame,
  tabViewStyle,
} from '@expo/ui/swift-ui/modifiers';

const fillFrame = frame({ maxWidth: Infinity, maxHeight: Infinity });
const pageFrame = frame({ minHeight: 320, maxHeight: 320 });

export default function PagerExample() {
  return (
    <Host style={{ flex: 1 }}>
      <TabView defaultSelection="1" modifiers={[pageFrame, tabViewStyle({ type: 'page' })]}>
        <TabView.Tab value="0">
          <Page label="Page 1" color="#6200EE" />
        </TabView.Tab>
        <TabView.Tab value="1">
          <Page label="Page 2" color="#03DAC5" />
        </TabView.Tab>
        <TabView.Tab value="2">
          <Page label="Page 3" color="#FF5722" />
        </TabView.Tab>
      </TabView>
    </Host>
  );
}

function Page({ label, color }: { label: string; color: string }) {
  return (
    <VStack alignment="center" modifiers={[fillFrame, background(color)]}>
      <Spacer />
      <Text modifiers={[font({ size: 28, weight: 'bold' }), foregroundStyle('#FFFFFF')]}>
        {label}
      </Text>
      <Spacer />
    </VStack>
  );
}
受控选择
🌐 Controlled selection
传递 selection 和 onSelectionChange 来从 React 状态驱动活动标签。每个 <TabView.Tab> 的 value 会与 selection 匹配。当 selection 从 JS 变化时,添加 animation 修饰符以为过渡添加动画。
🌐 Pass selection and onSelectionChange to drive the active tab from React state. Each <TabView.Tab>'s value is matched against selection. Add the animation modifier to animate transitions when selection changes from JS.
import { useState } from 'react';
import { Button, Host, Spacer, TabView, Text, VStack } from '@expo/ui/swift-ui';
import {
  animation,
  Animation,
  background,
  font,
  foregroundStyle,
  frame,
  tabViewStyle,
} from '@expo/ui/swift-ui/modifiers';

const fillFrame = frame({ maxWidth: Infinity, maxHeight: Infinity });
const pageFrame = frame({ minHeight: 320, maxHeight: 320 });

export default function ControlledTabViewExample() {
  const [selected, setSelected] = useState('0');

  return (
    <Host style={{ flex: 1 }}>
      <VStack>
        <Text>Selected: {selected}</Text>
        <Button label="Go to page 3" onPress={() => setSelected('2')} />
        <TabView
          selection={selected}
          onSelectionChange={setSelected}
          modifiers={[
            pageFrame,
            tabViewStyle({ type: 'page' }),
            animation(Animation.default, Number(selected)),
          ]}>
          <TabView.Tab value="0">
            <Page label="Page 1" color="#6200EE" />
          </TabView.Tab>
          <TabView.Tab value="1">
            <Page label="Page 2" color="#03DAC5" />
          </TabView.Tab>
          <TabView.Tab value="2">
            <Page label="Page 3" color="#FF5722" />
          </TabView.Tab>
        </TabView>
      </VStack>
    </Host>
  );
}

function Page({ label, color }: { label: string; color: string }) {
  return (
    <VStack alignment="center" modifiers={[fillFrame, background(color)]}>
      <Spacer />
      <Text modifiers={[font({ size: 28, weight: 'bold' }), foregroundStyle('#FFFFFF')]}>
        {label}
      </Text>
      <Spacer />
    </VStack>
  );
}
页面指示点
🌐 Page indicator dots
将 indexViewStyle 修饰符与 tabViewStyle({ type: 'page' }) 一起使用以控制点指示器。将 indexDisplayMode 设置为 'always'、'never' 或 'automatic',并将 backgroundDisplayMode 设置为在点后渲染半透明的胶囊。
🌐 Use the indexViewStyle modifier together with tabViewStyle({ type: 'page' }) to control the dot indicators. Set indexDisplayMode to 'always', 'never', or 'automatic', and backgroundDisplayMode to render a translucent pill behind the dots.
import { Host, Spacer, TabView, Text, VStack } from '@expo/ui/swift-ui';
import {
  background,
  font,
  foregroundStyle,
  frame,
  indexViewStyle,
  tabViewStyle,
} from '@expo/ui/swift-ui/modifiers';

const fillFrame = frame({ maxWidth: Infinity, maxHeight: Infinity });
const pageFrame = frame({ minHeight: 320, maxHeight: 320 });

export default function PageIndicatorExample() {
  return (
    <Host style={{ flex: 1 }}>
      <TabView
        modifiers={[
          pageFrame,
          tabViewStyle({ type: 'page', indexDisplayMode: 'always' }),
          indexViewStyle({ backgroundDisplayMode: 'always' }),
        ]}>
        <TabView.Tab value="0">
          <Page label="Page 1" color="#4F8DF6" />
        </TabView.Tab>
        <TabView.Tab value="1">
          <Page label="Page 2" color="#34C759" />
        </TabView.Tab>
        <TabView.Tab value="2">
          <Page label="Page 3" color="#FF9F0A" />
        </TabView.Tab>
      </TabView>
    </Host>
  );
}

function Page({ label, color }: { label: string; color: string }) {
  return (
    <VStack alignment="center" modifiers={[fillFrame, background(color)]}>
      <Spacer />
      <Text modifiers={[font({ size: 28, weight: 'bold' }), foregroundStyle('#FFFFFF')]}>
        {label}
      </Text>
      <Spacer />
    </VStack>
  );
}
底部标签栏
🌐 Bottom tab bar
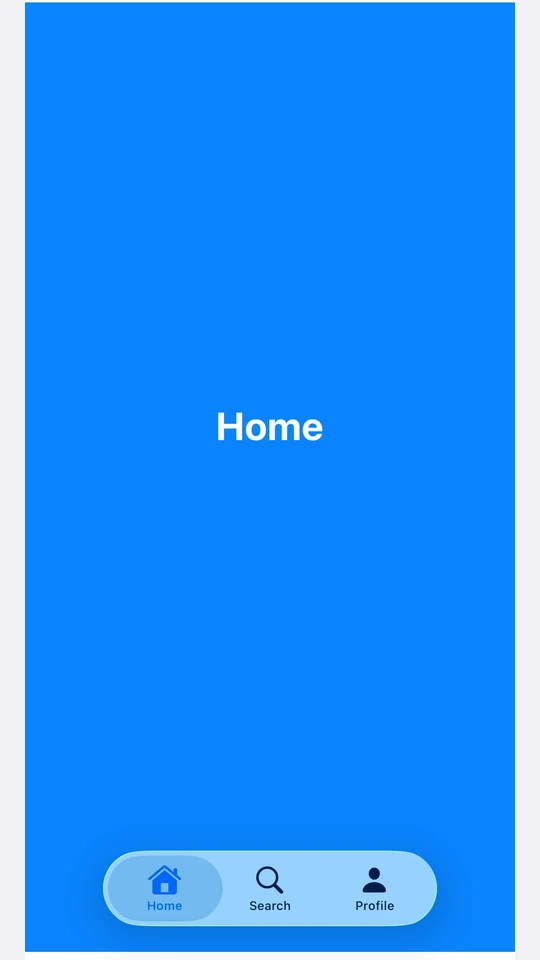
使用 tabViewStyle({ type: 'automatic' }) 来表示 SwiftUI 默认的标签栏。每个标签的 label 和 systemImage 填充栏项目。在标签上使用 badge 修饰符来为其栏项目添加徽章。
🌐 Use tabViewStyle({ type: 'automatic' }) for the SwiftUI default tab bar. Each tab's label and systemImage populate the bar item. Use the badge modifier on a tab to attach a badge to its bar item.
注意: 对于跨全屏路由的底部标签路由导航,请改用
expo-router/unstable-native-tabs。
import { useState } from 'react';
import { Host, Spacer, TabView, Text, VStack } from '@expo/ui/swift-ui';
import {
  background,
  badge,
  font,
  foregroundStyle,
  frame,
  tabViewStyle,
} from '@expo/ui/swift-ui/modifiers';

const fillFrame = frame({ maxWidth: Infinity, maxHeight: Infinity });

export default function BottomTabsExample() {
  const [selected, setSelected] = useState('inbox');

  return (
    <Host style={{ flex: 1 }}>
      <TabView
        selection={selected}
        onSelectionChange={setSelected}
        modifiers={[tabViewStyle({ type: 'automatic' })]}>
        <TabView.Tab value="inbox" label="Inbox" systemImage="tray.fill" modifiers={[badge('3')]}>
          <Page label="Inbox" color="#4F8DF6" />
        </TabView.Tab>
        <TabView.Tab value="sent" label="Sent" systemImage="paperplane.fill">
          <Page label="Sent" color="#34C759" />
        </TabView.Tab>
        <TabView.Tab value="drafts" label="Drafts" systemImage="square.and.pencil">
          <Page label="Drafts" color="#FF9F0A" />
        </TabView.Tab>
      </TabView>
    </Host>
  );
}

function Page({ label, color }: { label: string; color: string }) {
  return (
    <VStack alignment="center" modifiers={[fillFrame, background(color)]}>
      <Spacer />
      <Text modifiers={[font({ size: 28, weight: 'bold' }), foregroundStyle('#FFFFFF')]}>
        {label}
      </Text>
      <Spacer />
    </VStack>
  );
}
应用接口
🌐 API
import { TabView } from '@expo/ui/swift-ui';
Component
Type: React.Element<TabViewProps>
A SwiftUI TabView. Pair with modifiers to choose the appearance:
tabViewStyle({ type: 'page' })— swipeable pager.tabViewStyle({ type: 'automatic' })— bottom tab bar.tabViewStyle({ type: 'sidebarAdaptable' })— sidebar on iPad, tab bar on iPhone.
Use <TabView.Tab> children to define pages. Each tab is identified by its
value prop, which is used for selection.
For routed bottom-tab navigation across full-screen routes, prefer
expo-router/unstable-native-tabs.
stringIdentifies this tab. Matched against the parent TabView's selection
and defaultSelection props.
union<TabView.Tab> elements defining the pages.
Acceptable values are: ReactElement<unknown, string | JSXElementConstructor<any>> | ReactElement[]
stringThe initially selected tab when the component is uncontrolled
(no selection prop). Ignored if selection is provided.
(selection: string) => voidCalled when the selected tab changes.
stringThe selected tab (controlled mode). Pair with onSelectionChange.
Pass defaultSelection instead to let the native view manage state.